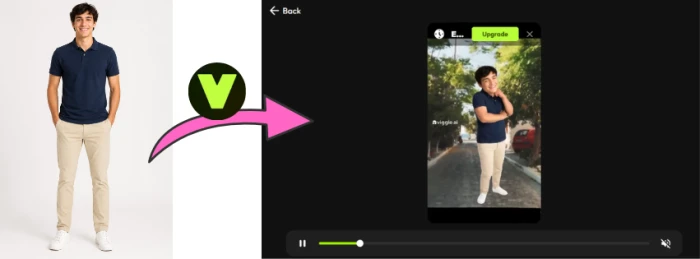
Mix is the Viggle feature that made the whole platform go viral. You hand it a still character image and a motion clip, and it gives you a video of that character performing the exact motion. The first time I ran it, the output was clean enough that the hype made sense inside of a minute.
The core workflow is free, every step below included.
This guide walks the web app from sign-in to a finished MP4 on a free account. I will mark the two spots where a paid plan changes things, but you can make a complete Mix video without paying a cent.
What you need before you start
Two inputs and an account. The account is free. For the inputs, you need a character image and a motion source, and the quality of both decides how good your result is more than any setting inside the app.
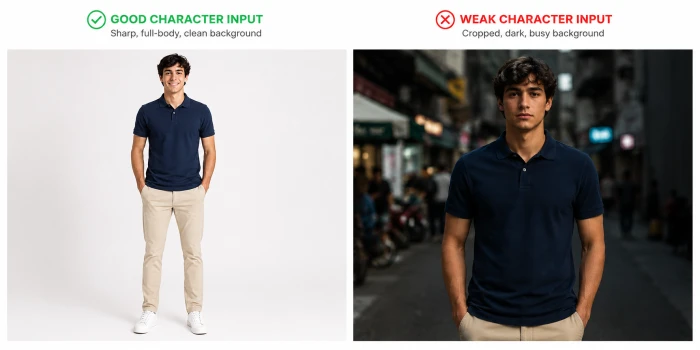
For the character, use a clear, full-body image with the subject facing forward and a clean background. Cropped or busy photos give the model less to work with and tend to produce messier output.
For the motion, you have two options, and I will cover both in Step 2: upload your own clip, or pick one from Viggle's template library. If you upload, a video with one person and clear, well-lit movement works best.
Step 1: Sign in and open Mix
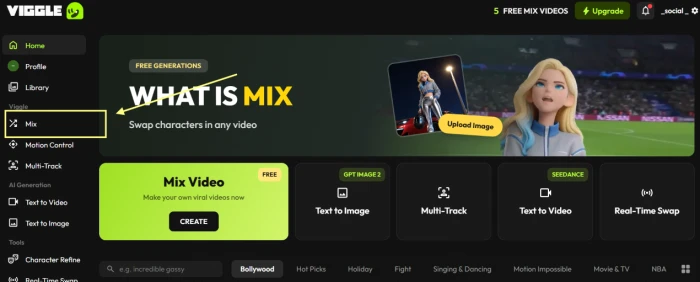
Go to viggle.ai and sign in with Google or an email address. A free account lands you on the dashboard with Mix front and center. Open Mix, and if the app offers a model choice, select the V4 model, which is Viggle's current motion engine.
Step 2: Choose your motion source
Mix needs something to move to, and you have two routes here.
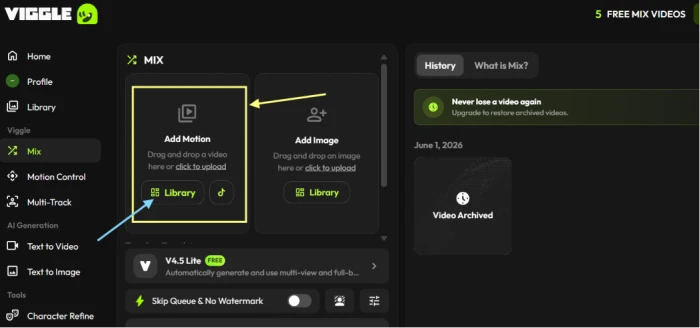
To use your own clip, find the Motion section and upload a video by dragging it in or selecting it from your computer. Viggle accepts MP4, MOV, M4V, and GIF files up to 30 seconds. Pick footage with one person and clear movement, since busy or dark clips confuse the motion tracking.
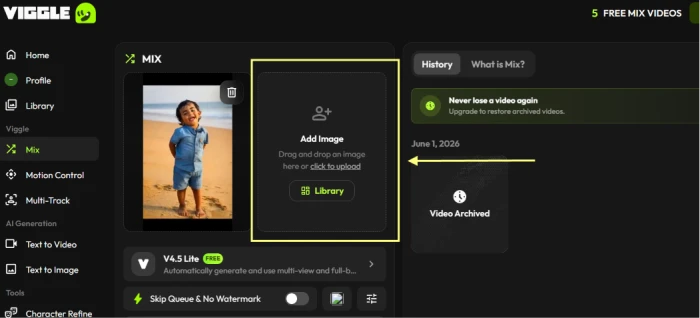
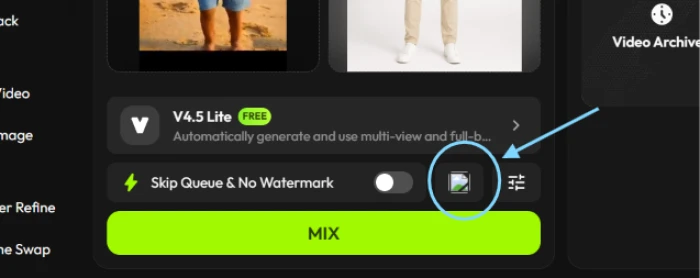
To skip the upload, click the Template icon and choose a motion from Viggle's library instead. This is the faster path, and it is how most viral clips get made, since the trending dances are already sitting there. As you can see in the screenshot below the yellow rectangle shows the area from where you can add your own clip and sky blue arrow points from where you can choose their template videos.
Step 3: Upload your character image
In the Character section, upload the image you prepared. This is the character that will perform the motion. A full-body image with a clean background gives the best result, as I covered before you started.
The model maps the movement onto your character while keeping their face and outfit recognizable, so a clean source image pays off in a cleaner animation.
Step 4: Set the background
By default, Viggle keeps the original background from your motion video or template. If you want something cleaner, you can switch to a custom background, or to a plain white or green screen that makes later editing easier.
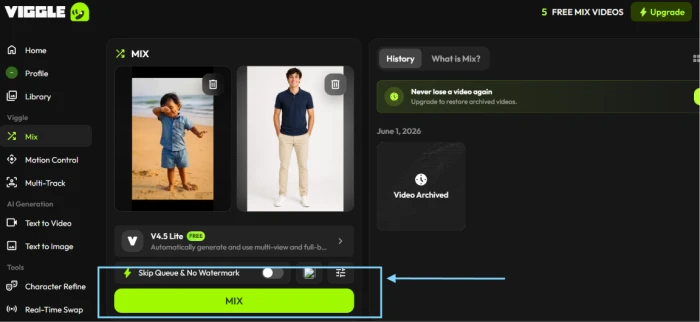
Step 5: Generate the clip
With both inputs in place, click the button to generate, which reads Create on the web app. Viggle is quick about it: most clips finish in seconds to under a minute, far faster than tools that take several minutes per clip. If you used a template, your output runs the same length as that template.
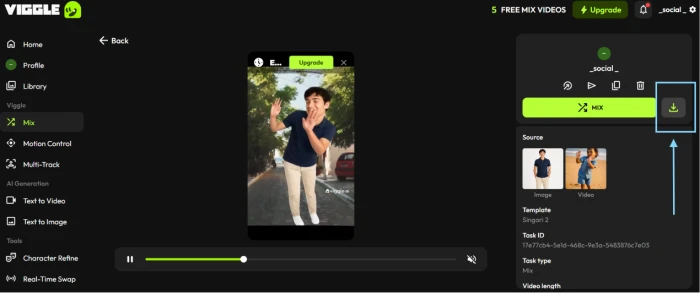
Step 6: Preview and download
When the render finishes, your video appears on the right. Click it to preview and check the motion, the character likeness, and the timing. If something looks off, swapping to a cleaner input usually fixes more than re-running the same clip.
Happy with it? Click the download icon to save it as an MP4. On a free account the file carries a Viggle watermark and caps at 720p, which I will come back to at the end.
Getting better results
A few habits make a real difference.
Start with the cleanest inputs you can. A clean, well-lit full-body image and a simple motion clip will beat any amount of fiddling with settings.
Keep the motion simple to begin with. Walking and steady dance moves track well, while fast spins or jumps are where the model is most likely to slip. Once you trust the basics, push into harder motion.
Resist the urge to over-tweak. The default settings are tuned to give good output on the first try, so change one thing at a time rather than everything at once.
Adding sound after export
One thing to know up front: Viggle output has no audio. The clips come out silent, so the sound gets added afterward.
Most creators drop the MP4 into a free editor like CapCut to lay a track or voiceover under it, then export again for posting. It is a quick extra step, and it is the same one nearly every Viggle video on your feed has gone through.
Where the free tier stops
Everything above works on a free account, so it helps to know exactly where the free tier ends before you bump into it.
The limits on your output are the watermark and the 720p cap, plus the fact that free-tier clips are not cleared for commercial use. A paid plan removes the watermark and lifts the resolution, and it clears your work for monetization.
Two features in the Mix area are paid as well. Character Refine, which builds extra reference angles of your character for steadier consistency, and standalone text-to-video, where you generate from a prompt with no reference clip, both sit behind the Pro plan. The premium models are the other paid pieces. Models like Veo and Kling run on credits, which only paid plans carry, so plain Mix with a template or your own clip stays the free path.
The bottom line
Mix earns its reputation. The workflow is short, and the free tier covers the whole core path. A clean character image plus a simple motion clip will get you a shareable video in a couple of minutes.
My advice after running it: put your effort into the inputs rather than the controls. The cleanest Viggle clips come from a sharp image and clear motion, not from stacking up setting changes. Get those two right and the free tier is all most people will need.
Comments
Join the discussion and share your perspective.