I went into SpicyChat.ai expecting a long setup and walked out about five minutes later with a character who greeted me by name. That gap between what I expected and what I got is the reason I sat down to write this guide.
Think of this as the companion piece to my main SpicyChat.ai review. The review answers what the platform is and whether it earns your time. This guide has a narrower job. It walks you through building your first chatbot, one screen at a time, using the exact character I made while testing.
By the final screenshot, you will have a bot that talks back.
I start at the login, because nothing on the platform opens up for you until you are signed in. Everything after that follows in order, so you can keep this open in a second tab and click along with me. For a complete breakdown of features, performance, and usability, see our in-depth Spicychat AI review. In this walkthrough, I also flag one small mistake I nearly made near the end, so you can skip it.
What I had ready before I started
Before I touched a single button, I had a few things sitting ready. None of them took long to sort out.
| What I prepared | Required? | Why it helped |
|---|---|---|
| A free SpicyChat account | Yes | You cannot save a character without one. |
| A rough character idea | Yes | Even a single sentence gives you something to type into the form. |
| An avatar image | Optional | You can generate one inside the tool, so your own file is a bonus rather than a must. |
With those in hand, the login was the only thing standing between me and the build.
Step 1: Signing in
The sign-in button sits in the top right corner of the homepage, next to the premium and language options. You can scroll the public character feed without an account, but the moment you want to create your own, the platform asks you to log in.
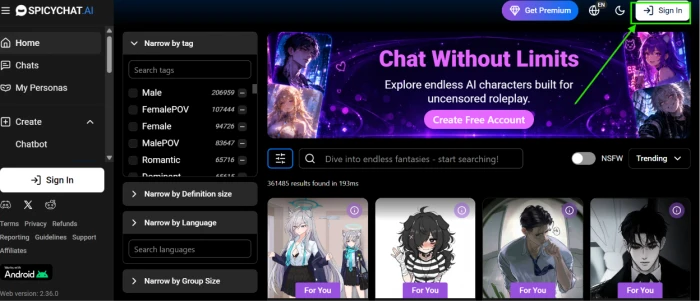
I signed in with email. Once the page reloaded, my account avatar replaced that button and a small Free badge appeared in the same corner. That badge is your sign that you are in and ready for the next move.
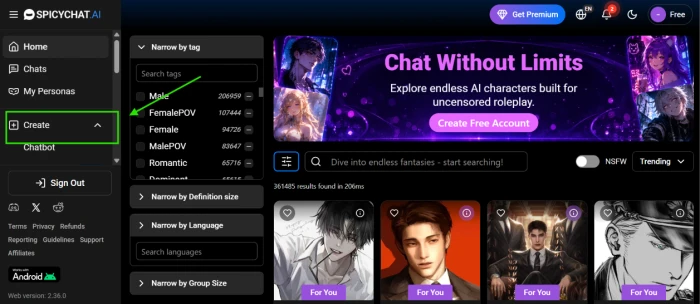
Step 2: Opening the Create menu
Look at the left sidebar. Once you are logged in, a Create option appears below My Personas. Clicking it expands a small menu, and this is where the platform quietly shows you how much it can do.
Expanded fully, Create offers four build types. I have laid them out below so you know what you are skipping past on the way to the chatbot option.
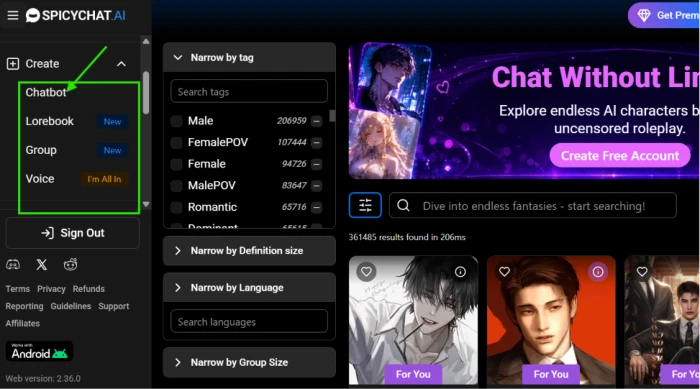
| Build type | What it makes |
|---|---|
| Chatbot | A single character you talk to one on one. This is the one we want. |
| Lorebook | A shared world or background that characters can pull from. |
| Group | A chat with more than one character at once. |
| Voice | Voice-based interaction for your character. |
For a first build, Chatbot is the right door. I clicked it and the main creation dashboard loaded. We spend the next several sections inside that dashboard, so it is worth a proper look.
Step 3: The avatar and naming fields
The Create Chatbot dashboard is one long form. Rather than throw every field at you at once, I filled it from top to bottom, and I will walk it the same way.
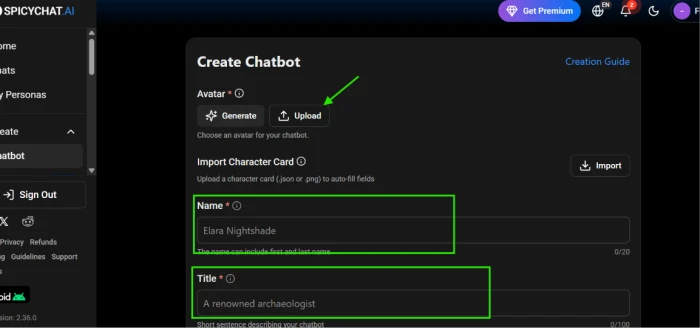
The first block is the avatar. You get two buttons. Generate hands the job to the platform's image model, while Upload lets you bring your own picture. I come back to the generate route in the tips at the end, since it is easy to lose time there.
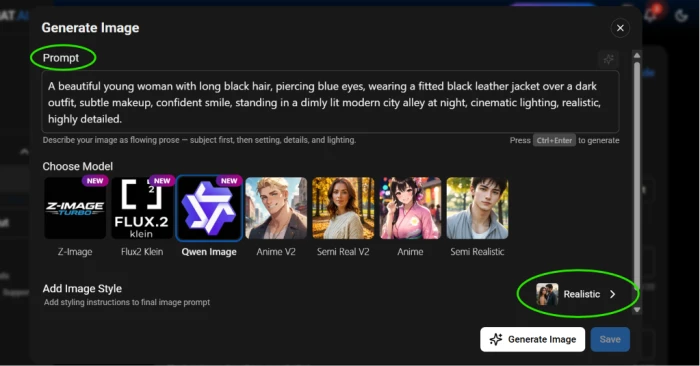
The character image it generated you can see in the below screenshot
Below the avatar sits Import Character Card. If you already have a character saved as a .json or .png card from another tool, the Import button auto-fills the form for you. I built mine from scratch, so I left this alone.
Next come the two fields that name your character.
| Field | Limit | What I typed |
|---|---|---|
| Name | 20 characters | Elara Nightshade |
| Title | 100 characters | A renowned archaeologist |
The name can hold a first and last name. The title is a one-line hook that shows under the character later, so I treated it like a tagline rather than a full description. The longer description goes further down, in the personality field we reach in the next step.
Step 4: The greeting and personality fields
Scroll down and two larger boxes appear. These are the heart of the character, and the platform marks them with a red asterisk because it will not let you finish without them.
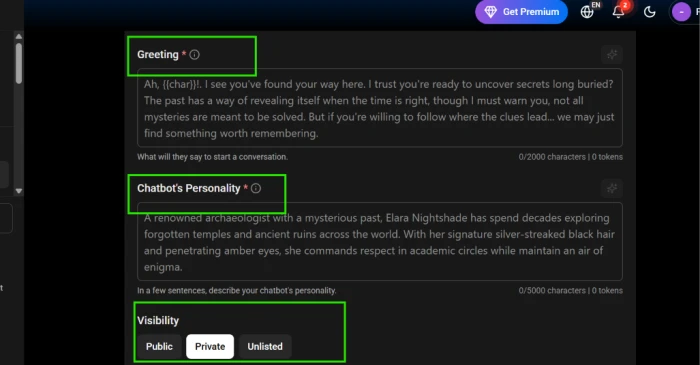
The greeting
The greeting is the first thing your character says when a chat opens. The example I used leans into mystery, hinting at secrets without giving them away. One detail worth knowing: the box accepts placeholders. Type {{char}} and the platform swaps in your character's name. Type {{user}} and it swaps in the name of whoever is chatting. When your character speaks to the player, {{user}} is the placeholder you want, so the line reads naturally for every person who opens the chat.
The personality
The personality box is where the character forms. I described Elara in a few sentences covering her background as an archaeologist and the air of mystery she carries. The platform nudges you to keep this short, and there is a reason beyond style. Every word here spends from a token budget, which I explain in the next step.
The visibility switch
Underneath sits Visibility, a row of three buttons. This setting decides who can find and use your character, and it is easy to click past without thinking. Here is what each one means.
| Visibility | Who can see it |
|---|---|
| Public | Anyone on the platform can find and chat with it. |
| Private | Only you. This is the safe default for a first build. |
| Unlisted | Hidden from search, but reachable by anyone with the direct link. |
I kept my first character on Private while I tested it. You can switch to Public later, once the personality reads the way you want.
Step 5: Tags and the token budget
Keep scrolling and the form moves from creative work to housekeeping.
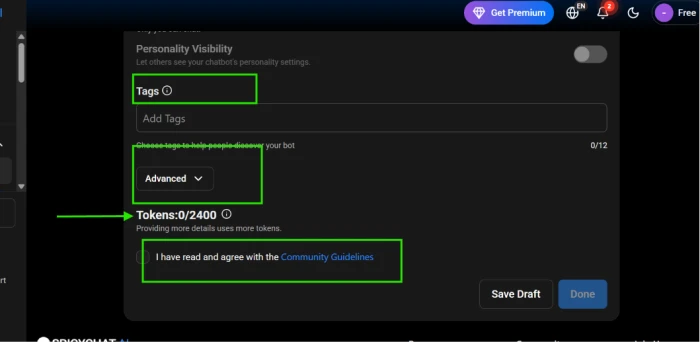
A Personality Visibility toggle at the top of this block lets other users peek at your character's settings. I left it off for a first build.
The Tags field lets you attach up to twelve labels that help people discover your character once it is public. Since I started on Private, I added these loosely, knowing I could refine them before going live.
Below that is an Advanced dropdown. It stays collapsed by default and hides the deeper fields where you shape scenarios and example dialogue. For a first character you can leave it closed, which is what I did. I have added a placeholder below for the expanded view, in case you want to see what waits inside.
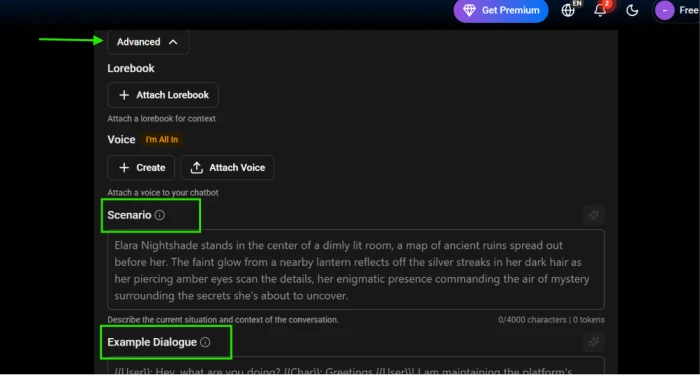
Now the token counter. You will have spotted it climbing as you typed. Mine read Tokens 0/2400 on a blank form and 94/2400 once Elara was written out. A token is roughly a chunk of a word, and the 2400 figure is the budget your character's definition gets to spend. The personality we wrote in Step 4 is the biggest single draw on that budget, and any advanced fields you fill in pull from the same pool.
Detail is good, but a bloated definition crowds out the model's room to respond. I aimed for clear over exhaustive.
The last item in this block is a checkbox agreeing to the Community Guidelines. You cannot finish without ticking it, which brings us to the final button.
Step 6: The button I almost got wrong
Here is the small mistake I promised at the start. Two buttons sit side by side at the bottom of the form. Save Draft keeps your work without publishing it. Done is the one that creates the character. I nearly clicked Save Draft out of habit, then caught myself.
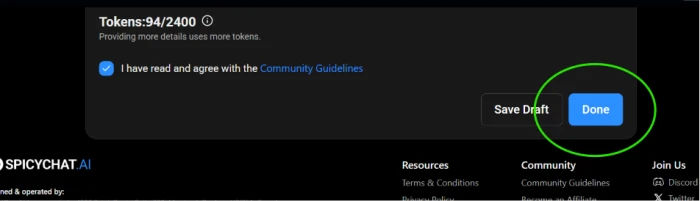
I ticked the box agreeing to the guidelines, watched the Done button turn from grey to blue, and clicked it. With 94 of my 2400 tokens spent, Elara was finished.
Step 7: Meeting the character
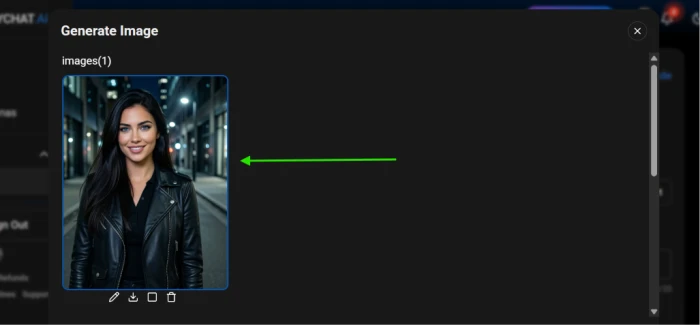
Clicking Done dropped me straight into a chat window with my new character waiting on the first line. This is the payoff the title promised: a blank account turned into something that speaks.
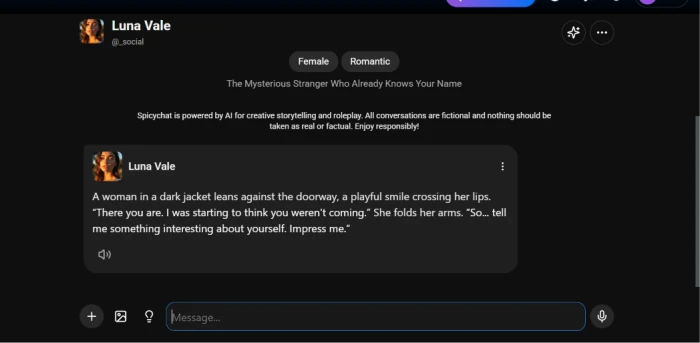
One honest note about the screenshot above. It shows Luna Vale, a character I had built on an earlier run, rather than Elara. I used that image because the chat screen came through most clearly there, and the build steps were identical for both. Whichever character you make, you land on the same screen. Your character opens with its greeting, and a message box waits at the bottom for your first reply.
I typed my first line, the character answered in seconds, and the build stopped being a build. It was a conversation.
What I would tell a friend starting today
A few things became clear only after I had built one character. Here is what I would pass on.
- Start on Private. You can flip to Public the moment the personality reads right, and there is no rush to put a half-formed character in front of strangers.
- Spend tokens on personality, not padding. A tight, specific description gives the model better material than a long vague one.
- Use {{user}} in the greeting. It is a small touch that makes the opening line feel written for each person who chats.
- Save the avatar for last. Generating or uploading an image is quick, and it is easy to lose an hour fiddling with it before the character even has a personality.
Your finished characters collect under your profile, where you can edit any of them later. I have left a placeholder below for that view, since it is the screen you return to most.
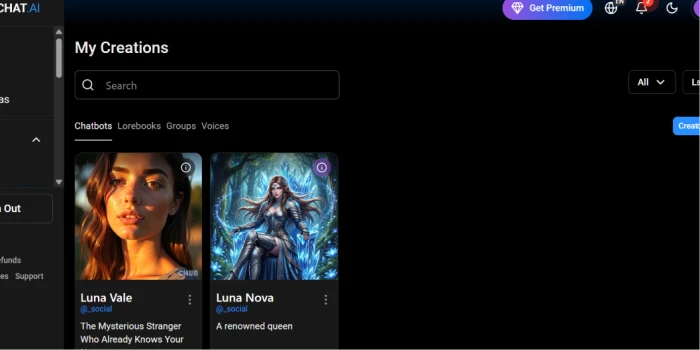
Edit access matters more than it sounds, because the first version of a character is rarely the last. Mine has been rewritten twice since, and the form reopens to exactly where I left off each time.
The Bottom Line
The build itself was the easy part. Seven screens, a few paragraphs of writing, and one button I almost misread. If you set aside an evening, the slow step won't be the form. It will be deciding who your character actually is.
That is my honest verdict on SpicyChat as a creation tool. It drops the barrier so low that the work shifts onto your imagination instead. A dull result or a living one comes down to what you typed into the personality box back in Step 4, not to any setting you skipped.
I am on my third rewrite of Elara now, and each pass took ten minutes and made her sharper. That loop of writing, then tweaking after a real chat, is where the platform earns its keep.
Comments
Join the discussion and share your perspective.